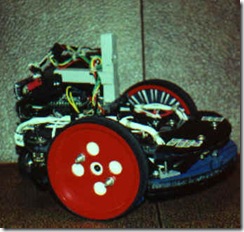
I have been meaning to blog about one of the coolest projects I have been involved with for a while now but I have been too busy to do so.  Back in June of 2006 I got involved with Bob Pitzer (Botbash), Chris Harriman and Joel Meine, in providing a software/hardware solution for the FIRST Robotics Competition for their upcoming 2007 season.  FIRST is a non profit organization that is dedicated to teaching young minds about science and technology through several fun filled robotics competitions.  Make sure you check out their web site to see how you might be able to get involved in this great program.  Also check out the 2007 video archive to see how exciting these events can be.  Make sure you pay attention to the computer graphics that are superimposed over the live video because that is what we built! 

The software and hardware we built was used to manage multiple 3 day events over a months time frame.  This ended up being around 40 events across the US in roughly 30 days.  Each event had anywhere from 30 to 70 teams competing.  Each day of the event had to be executed in an efficient manor in order to complete the tournament style competition.  The system was designed at a high level to do the following:

  • Lead an event coordinator through the steps of managing a tournament
  • Maintain a schedule of matches over a 3 day period
  • Inform the audience of match scoring in real time
  • Broadcast live video mixed with real time match score information to the web
  • Inform the other competitors in the Pit area of upcoming matches, match results, and real time team ranking details as each match completes.
  • Control the field of play from a central location
  • Gather scoring details from judges located on the field
  • Provide periodic event reports for online viewing as the tournament progresses

All of this was done using Microsoft .Net along with various open source .Net projects to speed up the development process and provide a robust system that was easy to use by various volunteers. 

I used various pre-built components in order to build this system.  Since this application needed to interface with multiple hardware components and provide a rich user interface a Windows Forms application was going to be required.  I chose the Patterns and Practices Smart Client Software Factory (SCSF) as the basis for the Windows Forms framework.  I had used this Framework in a previous project and I knew it would give me the modular design I needed to accomplish the functional goals of the design.  I wanted a solution that allowed for me to do a lot of Unit Testing as I was going to be the only developer doing the work and the amount of QA testing was going to be very small.  Since the SCSF used a Model View Presenter pattern I knew that testing would not be an issue.  Also SCSF uses a dependency injection pattern that would also lend itself very well for unit testing.  Another benefit of the dependency injection pattern was that I could mock out some of the hardware interfaces so that I did not have to have a fully functional robot arena in my home office!  I actually developed the hardware interface without ever connecting to the hardware on my development machine.  This was done by establishing a good interface and using a mock implementation of this interface to complete all the business logic without having any hardware.  Then at a later date we implemented the real hardware layer and even to this day I use the mock implementation for all development work since I do not have an arena in my office. 

For the data access layer I choose to use SubSonic as it provided a very fast way to generate the data access layer from a database schema.  Using SubSonic gave me the flexibility to grow the data model really fast as the solution emerged over time.  The database back end was SQL Server Express 2005.  Since the solution only required a small set of clients and it had to be disconnected from the Internet  SQL Server Express was right for the job. 

Deployment of the application was done with ClickOnce in a full trust environment.  This enabled me to make changes to the application throughout the tournament and the software on each playing field computer remained at the most recent version.  The click once deployment also managed the upgrade process for any database changes as well. 

The central control of the field of play was handled by a single .Net Win Forms application that interfaced to Programmable Logic Controllers (PLC) via a third party managed library.  This library allowed for me to set PLC memory locations as well as monitor locations without having to worry about the TCP/IP communications protocol.  This was a great time saver as I could concentrate on high level business value rather than low level communications.  Since the low level communications was not required I did not have to spend a lot of time with debugging hardware/software integration problems.

Another key area of integration was providing a Hardware UI that consisted of LCDs and Buttons that enabled a field operator to manage the match process without using the computer keyboard or mouse.  This was done using a serial port communicating to a BX24 from Netmedia.  The user would actuate buttons on the hardware UI in order to start or stop the match as well as many other tournament related functions.  The hardware UI would lead the operator to the next step by flashing the most appropriate button for the current point of the match.  This made the operators job a lot easier. 

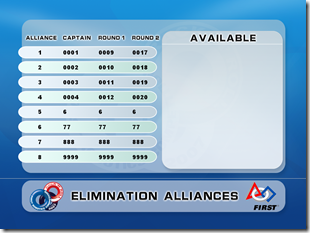
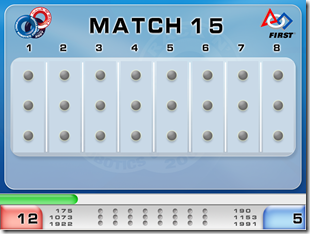
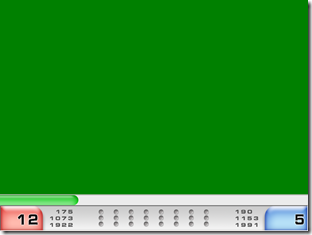
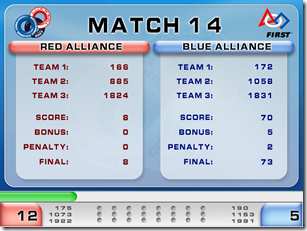
The audience needed to be informed about what is going on during the event.  An announcer was always present at these events but the audience also needed visual cues that made it apparent what was going on.  So I created a win forms audience display application that would provide the detail the audience needed.  This detail was not only displayed to the live audience but it was also broadcast over the Internet to individuals that where not able to attend physically.  This audience display showed live video as well as match statistics mixed together on one screen (you can see this in action in the video links I mentioned above).  This screen was projected up onto a huge screen so all audience members could see with great ease.  The live video mixing was done using a green screen technique that is often used with the weatherman on local news stations.  Basically a green color is used in a color keying process to superimpose the live video over the green color.  The screen snapshots below give you an idea of the type of information that was presented to the audience as well as the web broadcast.


2007-02-21_135125      2007-02-21_135226

AlliancePairingSample      2007-02-21_135201

Well I could go on and on about details of the application we wrote to make the 2007 FIRST FRC event a great success but I think I will save it for a set of later posts.  Also I have been working on the software for the 2008 season that uses WPF for an even more richer user experience (can anyone guess I used some animations!).
Heathkit was an awesome company that supplied electronic kits for educational purposes back in the 80's and 90's.  Their products where a bit on the pricey side but where else could you get a TV in kit form that you had to build.  I bought an Oscilloscope from them and put it all together in several weekends.  I also had a single board computer that was sold by Heathkit that I did not actually build but I used it for teaching myself how to program using machine(Assembly) language.

Well Heathkit is back in action and one of the best products they offered is also back.  The Hero Robot of the 80's is now called HE-RObot.  Back in the 80's you could get this robot in kit form or fully assembled.  I was never able to purchase one but I worked for a company repairing electronic equipment and the owner's son ended up getting one.  It was one of the coolest things I saw and it probably was one of the reasons I became so interested in robotics in the first place.  I don't remember all the specifics of the original robot but from what I remember it had sonar ranging, optical wheel encoders, light sensors, current sensors, and sound sensors.

Well the new Hero is a partnership between White Box Robotics and Heathkit.  The new HE-RObot comes with an onboard PC with an XP operating system and Microsoft Robotics Studio as the programming environment.  Finally a product is in the market place that combines both of my passion's: Robotics and Microsoft .Net.  This is a very powerful robot but I do not see too many details on what sensors will be offered.  On the web site it looks like it will include IR, Web Camera, and Audio.  I sure would like to see a few more details on what other capabilities it will have as far as sensors go. 

The web camera is going to be real powerful as a sensor.  I was fortunate enough to evaluate an ER1 robot from Evolution Robotics.  I wrote an article about this experience called 30 Days of ER1 back in 2003.  The live video pattern recognition routines put a whole new meaning to navigating your environment.  I am pretty sure White Box Robotics has licensed the software that handled pattern recognition from Evolution Robotics so the HE-RObot will have the same capabilities.

Overview

The following article was originally posted by me on the Phoenix Area Robotics eXperimenters web site.  I moved the article here on my blog as I no longer belong to the Robotics group.  You can find the original article on the PAReX site.

Building a Maze Robot

My maze robot DR X took first place in BotBash’s 2000 Autonomous Maze competition. The competition consisted of three mazes with different configurations. The robot that completed all three mazes in the shortest time wins the event. Each robot had five chances to complete all three mazes. The shortest three times where summed up for the final score. DR X was the only robot able to complete all three mazes in the allotted time frame. This article was written as an attempt to explain the techniques used to allow DR X to accomplish first place.

There are several techniques that can be used in solving mazes:

  • Random
  • Wall Following
  • Mapping

Random navigation does not seem like a very elegant way to master a maze so my choices were mapping or wall following algorithms. Mapping a maze can be very difficult to do and this competition did not really reward such a task. So that leaves wall following as the best bet to complete the maze.

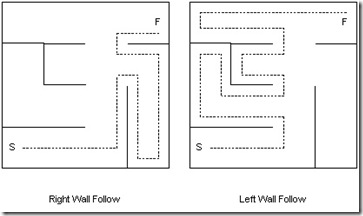
Wall following can be best explained by imagining yourself in a maze with your eyes closed. If you could place one hand on a wall and never let the hand leave the wall you will eventually find the end of the maze as long as the finish is not an island in the middle of the maze. It is very important to follow only one wall until you reach the end.

The following drawings show right and left wall following paths for a given maze.

wallfollow

Notice that in some cases it is better to choose one wall to follow over another. Here the shortest path from start (S) to finish (F) is via the right wall. So it is good practice to be able to command your robot to follow one wall over another before it is set in the start box. This can be accomplished by using the left and right bumper switches. Tapping the left or right switch before the start commands the robot to follow the left or right wall.

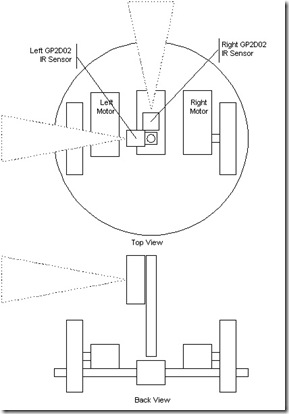
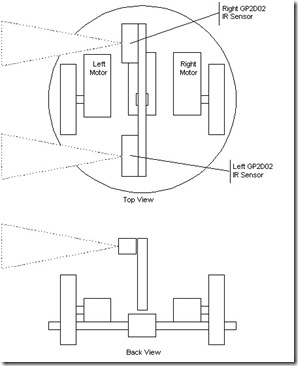
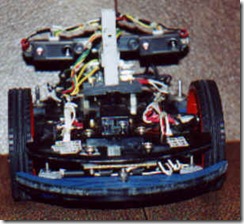
So I set out to build and program a maze robot to follow one wall. I choose to use a differential drive system on a round body. This would allow me to control the robot rather easily and prevent it from getting hung up on maze walls. I mounted two GP2D02 IR Sensors on a single shaft on top of a servomotor. The sensors were positioned 90 degrees apart. The servomotor allowed the robot to look straight ahead and the left or right wall at the same time.

DR X First Prototype

drxPrototype

In order to tell if the robot was getting closer or further away from a wall a minimum of two sensor readings would have to be taken over a period of time while the robot was moving. I had some difficulty in fine-tuning the reactions needed to prevent the robot from touching the walls. I quickly realized that this sensor arrangement had some shortcomings. I needed to be able to look at a wall and determine if the robot was parallel to it without moving forward. If I could achieve this, the robot would always start off parallel to a given wall. So I made some sensor placement changes that would not require the robot to be moving in order to determine if it was parallel or not.

DR X Second Prototype

drxPrototype2

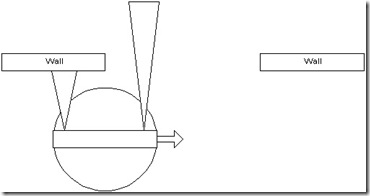
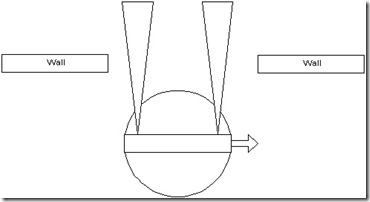
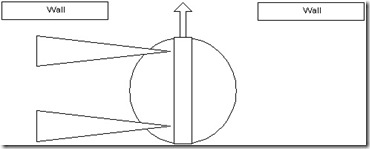
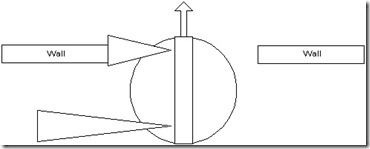
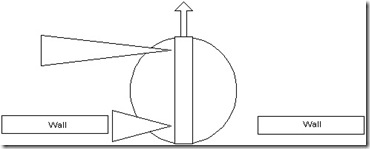
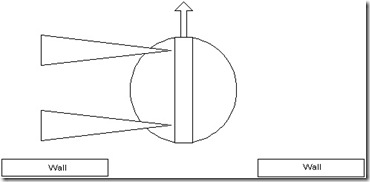
I found out some other advantages of this sensor arrangement. While the robot was following a wall and it approached a doorway of the maze the first sensor would detect the opening (doorway) very easily. Once the second sensor detected the doorway I knew the robot was directly in front of the entranceway. A 90 degree turn towards the entranceway would position the robot perfectly for passage through the door. Passage through the door would also be easily detected. As the robot moved forward, the door jam could be detected by both sensors. The robot could successfully determine when a door was found and navigate through the door rather easily.

The following drawings show the robot navigating through a doorway.

The robot approaches the doorway

door1

The robot passes the doorway

door2

The robot turns left 90 degrees

door3

The robot moves forward into the doorway

door4

The robot is almost through the doorway.

door5

The robot is through the doorway.

door6

DR X Front View

drx_front

DR X Side View

drx_side

Improvements

Well this solution certainly has room for improvement and it is not the only way to solve a maze. One major enhancement that I saw was DR X needed a sensor that could look in front of the robot while it was attempting to follow a wall. This would have prevented the robot from having to collide with a wall before it realized it needed to stop and turn.

Conclusions

Well this project sure was a gratifying experience. To watch my little creation navigate the maze was a great thrill. A lot of last minute hard work went into this robot but come event day it all paid off.